smartqq协议下的bot最麻烦的就是经常要扫二维码。。。
换了酷q on Docker
安装
安装docker
wget -qO- https://get.docker.io/ | sh
pull 酷q
docker pull coolq/wine-coolq
在任意目录创建一个空文件夹,用于持久化存放 酷Q 数据
mkdir /root/coolq-data # 任意路径均可
启动
先执行一次
docker run --name=coolq --rm -p 8080:9000 -v /root/coolq-data:/home/user/coolq -e VNC_PASSWD=12345678 -e COOLQ_ACCOUNT=10000 coolq/wine-coolq
当你看到 [CQDaemon] Started CoolQ . 时,说明已启动成功。
| 参数含义 | 参数示例 |
|---|---|
| 远程监听端口 | 8080 |
| 数据存放位置 | /root/coolq-data |
| 远程访问密码 | 12345678 |
| 机器人 QQ 帐号 | 10000 |
安装API
终止进程,cd /root/coolq-data/app
wget https://github.com/richardchien/coolq-http-api/releases/download/v3.4.0/io.github.richardchien.coolqhttpapi.cpk
启用api
再次启动:
docker run --name=coolq --rm -p 8080:9000 -p 127.0.0.1:5700:5700 -v /root/coolq-data:/home/user/coolq -e VNC_PASSWD=12345678 -e COOLQ_ACCOUNT=10000 coolq/wine-coolq
为了避免别有用心的大佬调戏机器人发送奇怪的东西,建议将外部5700只监听本地ip
访问 http://ip:8080 连接vnc 密码看上面参数含义中的介绍
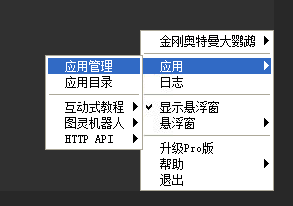
然后右键悬浮窗启用HTTP API插件
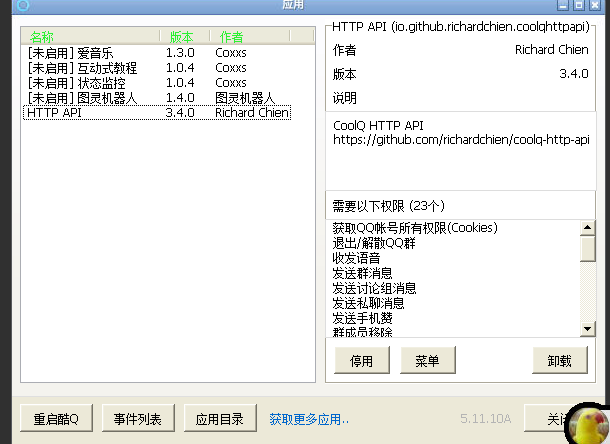
启用http api插件之后在coolq-data/app/io.github.richardchien.coolqhttpapi/目录下会有一个config.cfg的配置文件,根据需求修改
host=0.0.0.0
port=5700
use_http=yes
ws_host=0.0.0.0
ws_port=6700
use_ws=no
post_url=
access_token=
secret=
post_message_format=string
serve_data_files=no
update_source=https://raw.githubusercontent.com/richardchien/coolq-http-api-release/master/
update_channel=stable
auto_check_update=no
auto_perform_update=no
thread_pool_size=4
server_thread_pool_size=1
后台运行
把上面代码中的 --rm 改成 -d就行
docker run --name=coolq -d -p 8080:9000 -p 127.0.0.1:5700:5700 -v /root/coolq-data:/home/user/coolq -e VNC_PASSWD=12345678 -e COOLQ_ACCOUNT=10000 coolq/wine-coolq
API描述
参考文档:https://cqhttp.cc/docs/3.4/#/API
服务器推送代码
需要配置webhook,参考关于使用Discourse的Webhook和QQbot实现论坛动态推送的记录
没什么太大的变化
from flask import Flask,request,Response
import json,urllib,requests


headers = {'Content-Type': 'application/json'}
url='http://127.0.0.1:5700/send_group_msg'
group=1234567

def send(msg):
    data={'message':msg,'group_id': group}
    rsg=requests.post(url,headers=headers,data=json.dumps(data)).text
    print (rsg)
    return rsg

#n = bot.List('group','NotFound')[0]

app = Flask(__name__)


@app.route('/')
def hello_world():
    return 'hello world'


@app.route('/json',methods = ['POST'])
def my_json():
    headers = request.headers
    event = (headers['X-Discourse-Event'])
    content = request.json
    res={'msg':handle(event,content)}
    return Response(json.dumps(res),mimetype='application/json')


def new_topic(topic):
    content = topic
    topicName = str(content['topic']['title'])
    topicSlug = str(content['topic']['slug'])
    topicId = str(content['topic']['id'])
    userName = str(content['topic']['details']['created_by']['username'])
    url = 'https://parrotsec-cn.org/t/' + topicSlug + '/' + topicId
    msg='%s 发表了新主题: "%s" \n %s'%(userName,topicName,url)
    print (msg)
    return send(msg)


def new_post(post):
    content = post
    name = str(content['post']['name'])
    title = str(content['post']['topic_title'])
    topicSlug = str(content['post']['topic_slug'])
    topicId = str(content['post']['topic_id'])
    postNumber = str(content['post']['post_number'])
    url = 'https://parrotsec-cn.org/t/' + topicSlug + '/' + topicId + '/' + postNumber
    if 'reply_to_user' in content['post']:
        postTo = str(content['post']['reply_to_user']['username'])
        msg='%s 在主题 "%s" 中回复了 %s \n %s'%(name,title,postTo,url)
        return send(msg)
    else:
        msg='%s 在主题 "%s" 中发表了回复 \n %s'% (name,title,url)
        return send(msg)


def handle(event,myjson):
    if event == 'topic_created':
        if myjson['topic']['user_id']==-1:
            pass
        else:
            return new_topic(myjson)
    elif event == 'post_created':
        if myjson['post']['post_number'] > 1:
            return new_post(myjson)
    else:
        pass


if __name__ == '__main__':
    app.run(host = '0.0.0.0',port = 8000,debug = True)